menu

Homeowner's Guide to Roofing in Indianapolis | Master Your Roof Decisions with Expert Local Knowledge

Get the complete residential roofing handbook you need to make smart decisions about your Indianapolis home, from understanding Midwest weather damage to choosing the right contractor and materials for lasting protection.

Slider Image 1
Slider Image 2
Slider Image 3
Slider Image 4
Slider Image 5
Slider Image 7
Slider Image 8
Slider Image 9
Slider Image 10
Slider Image 11

Why Indianapolis Homeowners Need a Localized Roofing Manual

You cannot use a generic residential roofing guide when you live in Indianapolis. The freeze-thaw cycles here destroy roofs differently than in Phoenix or Miami. Your roof experiences temperature swings from below zero in January to 90-plus degrees in July. This expansion and contraction causes shingles to crack, flashing to separate, and underlayment to deteriorate faster than in stable climates.

Indianapolis sits in a hail belt. Spring storms drop golf ball-sized hail that bruises asphalt shingles and dents metal flashing. Most homeowners miss these signs until leaks appear months later. The clay soil beneath your foundation also shifts with moisture changes, causing structural movement that stresses roof framing connections.

This home roofing handbook addresses these specific challenges. You need to understand how ice dams form along your eaves when snow melts and refreezes. You need to know why your attic ventilation matters more here than in Southern states. A proper residential roofing 101 education for Indianapolis includes recognizing wind damage from straight-line storms that tear through neighborhoods like Broad Ripple and Fountain Square each summer.

Your roof protects your biggest investment. The roofing basics for homeowners in this region differ from national advice because your weather does not follow national patterns. You face humidity that promotes algae growth, wind that lifts shingles, and temperature extremes that age materials faster. This homeowner roofing manual gives you the specific knowledge to protect your Indianapolis home correctly.

Why Indianapolis Homeowners Need a Localized Roofing Manual
Understanding Your Roof System Components and Function

Understanding Your Roof System Components and Function

Your roof is a system, not just shingles. The decking forms the structural base, typically half-inch plywood or OSB sheathing nailed to your rafters or trusses. The underlayment sits on top of the decking. This waterproof barrier catches water that gets under shingles. In Indianapolis, we install synthetic underlayment that resists the temperature extremes better than traditional felt paper.

The shingles form your first defense. Asphalt shingles contain a fiberglass mat coated with asphalt and mineral granules. These granules protect the asphalt from UV damage and provide fire resistance. Wind tears shingles when the seal strip fails or when installers skip proper nailing patterns. You need six nails per shingle in our wind zone, not four.

Flashing seals the vulnerable areas where your roof meets walls, chimneys, and valleys. Step flashing interlocks with shingles along sidewalls. Counter-flashing covers step flashing and ties into the wall surface. Valley flashing channels water between two roof planes. Most leaks start at flashing, not shingles, because installers cut corners or use incorrect materials.

Your attic ventilation works with your roof to prevent moisture damage and ice dams. Soffit vents pull fresh air into the attic. Ridge vents or gable vents exhaust warm, moist air. This airflow keeps your attic temperature close to outdoor temperature, which prevents snow from melting on your roof deck and refreezing at the eaves. Elite Roofing Indianapolis calculates proper ventilation ratios during every inspection because inadequate ventilation destroys roofs from the inside out, especially in our humid climate.

How to Evaluate Your Roof Condition

Homeowner's Guide to Roofing in Indianapolis | Master Your Roof Decisions with Expert Local Knowledge
01

Visual Ground Inspection

Walk your property perimeter with binoculars. Look for curled shingle edges, missing granules creating dark spots, or lifted corners. Check valleys for debris accumulation and inspect flashing around chimneys for rust or separation. Examine your gutters for shingle granules, which indicate advanced wear. Note any sagging roof lines or visible damage to fascia boards. This ground-level assessment reveals obvious problems without climbing.
02

Attic Interior Assessment

Enter your attic on a sunny day. Look for light penetrating through the roof deck, which indicates holes or gaps. Check for water stains on rafters and decking, especially near chimneys and roof penetrations. Feel the insulation for dampness. Inspect the underside of the roof deck for dark streaks or mold growth. Verify ventilation is working by checking if attic temperature matches outdoor temperature closely during winter months.
03

Professional Documentation Review

Schedule an inspection with a licensed roofer who provides written reports with photos. The inspector should walk the entire roof surface, document shingle condition with close-up images, test flashing integrity, and measure remaining shingle life. You receive a detailed report showing problem areas, repair priorities, and realistic timeline for replacement. This documentation helps you budget accurately and provides evidence for insurance claims when storm damage occurs.

Why Local Expertise Matters for Indianapolis Roofing

Indianapolis building codes require specific wind resistance ratings that differ from surrounding counties. Marion County enforces updated codes that many contractors ignore or misunderstand. Your shingles must meet ASTM D3161 Class F wind resistance, which means they withstand 110 mph winds. Cheap contractors install Class A shingles that fail at 60 mph, leaving you vulnerable during severe weather.

The architectural styles in neighborhoods like Irvington, Butler-Tarkington, and Meridian-Kessler demand different approaches. Historic homes with steep roof pitches and complex hip-and-valley designs require advanced flashing techniques. Ranch homes in Castleton need proper ventilation calculations because their low-slope designs trap heat differently. A roofer familiar with Indianapolis housing stock recognizes these differences immediately.

Our weather creates unique challenges that out-of-state contractors miss. The combination of high humidity and temperature swings accelerates algae growth on north-facing slopes. Spring storms produce rotation that generates tornadic winds, not just straight-line winds. Your roof needs proper attachment methods that account for uplift forces. Elite Roofing Indianapolis has replaced hundreds of roofs after severe weather events, so we understand how local storms damage specific roof components.

Insurance companies scrutinize Indianapolis claims because storm chasers flooded the market after recent hail events. You need documentation that meets adjuster standards and a contractor who communicates effectively with insurance representatives. Local contractors maintain relationships with regional adjusters, which speeds your claim processing. We provide detailed estimates that match Xactimate pricing software, eliminating disputes over material costs or labor rates. Choosing local means choosing accountability that lasts beyond the installation.

What You Should Expect from Your Roofing Project

Project Timeline and Scheduling

Most residential roof replacements in Indianapolis take two to four days depending on size and complexity. Weather delays are common during spring and fall when rain interrupts work. Your contractor should tarp your roof completely each evening to protect against overnight storms. Expect noise and vibration during tear-off as crews remove old shingles and dispose of debris. Material delivery typically happens one day before installation begins. The crew arrives early, usually between 7 AM and 8 AM, to maximize daylight hours. Complete cleanup includes magnetic sweeps of your yard to collect stray nails, gutter cleaning, and disposal of all debris.

The Inspection and Estimate Process

A proper roof inspection takes 45 to 90 minutes. The inspector climbs onto your roof to assess decking condition, measures square footage accurately, and photographs damage areas. Inside your attic, they check ventilation adequacy, look for moisture damage, and evaluate insulation levels. You receive a written estimate within 48 hours that itemizes materials, labor, and disposal costs. The estimate should specify shingle brand and model, underlayment type, and flashing materials. Ask about decking replacement costs because you cannot know the full extent of rot until tear-off begins. Legitimate contractors provide detailed written contracts that outline payment schedules, project timeline, and warranty terms.

Installation Quality Standards

Quality installation starts with proper deck preparation. Crews replace damaged decking, install drip edge along eaves and rakes, and apply underlayment without wrinkles or gaps. Starter shingles line the eaves to prevent wind uplift. Each shingle receives six nails placed in the manufacturer's specified nailing zone. Valleys use metal flashing or woven shingle techniques depending on roof design. Step flashing integrates with each shingle course along sidewalls. Ridge cap shingles cover the peak with proper exposure and nailing. The final product shows straight lines, uniform appearance, and no exposed fasteners. Flashing should lay flat without gaps or lifted edges. Your roof should look clean and professional from every angle.

Post-Installation Support

Reputable contractors provide workmanship warranties separate from manufacturer material warranties. Workmanship warranties typically cover installation errors for 5 to 10 years. Manufacturer warranties cover shingle defects for 25 to 50 years depending on the product line. Register your warranty within 60 days of installation to activate coverage. Schedule annual inspections to catch minor issues before they become major problems. Storm damage evaluations should happen within weeks of severe weather events to document insurance claims properly. Your contractor should respond to callbacks promptly and address legitimate concerns without argument. Expect occasional granule loss during the first year as excess manufacturing granules wash off, but significant bare spots indicate defective shingles.

Frequently Asked Questions

You Have Questions,
We Have Answers

How Indianapolis Weather Patterns Accelerate Roof Aging

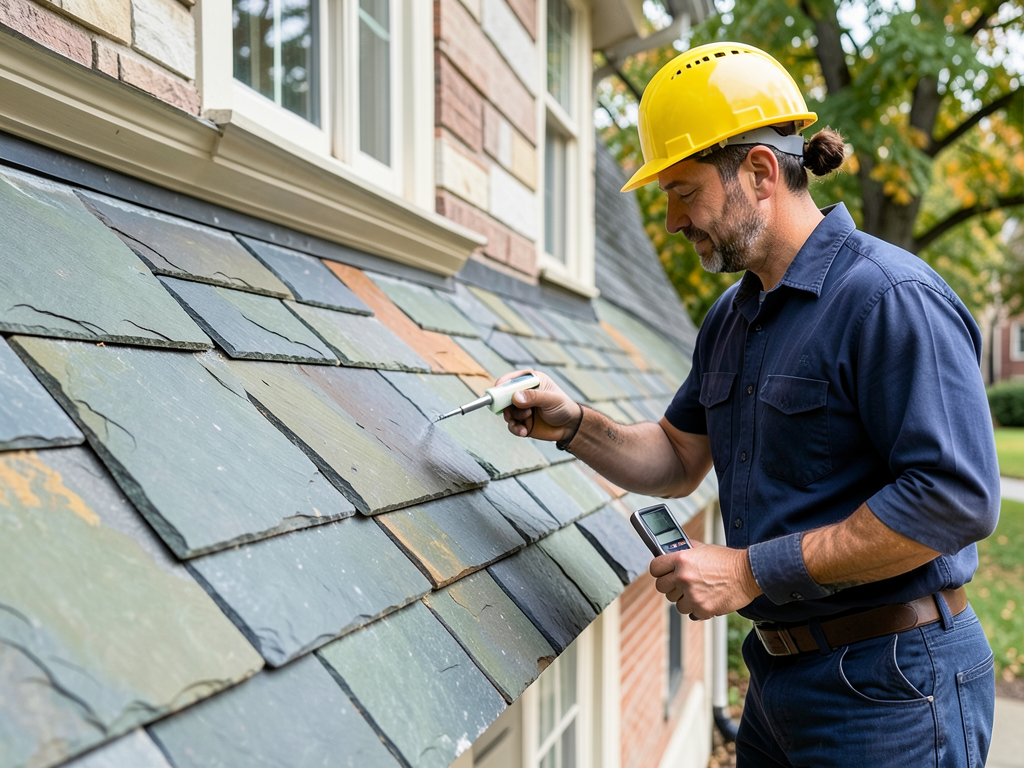
Indianapolis experiences 40 to 50 freeze-thaw cycles each winter, more than most Midwest cities. Water seeps under shingles or into small cracks, freezes overnight when temperatures drop, then melts during the day when sun hits your roof. This cycle repeats throughout winter, gradually widening gaps in flashing and separating shingle seal strips. Summer heat compounds the problem. Your roof surface reaches 160 degrees on July afternoons, making asphalt shingles pliable and vulnerable to wind damage. Afternoon thunderstorms with 50 mph straight-line winds lift these heat-softened shingles easily. The combination of extreme temperature swings and frequent severe weather means roofs here age 30 percent faster than in moderate climates.

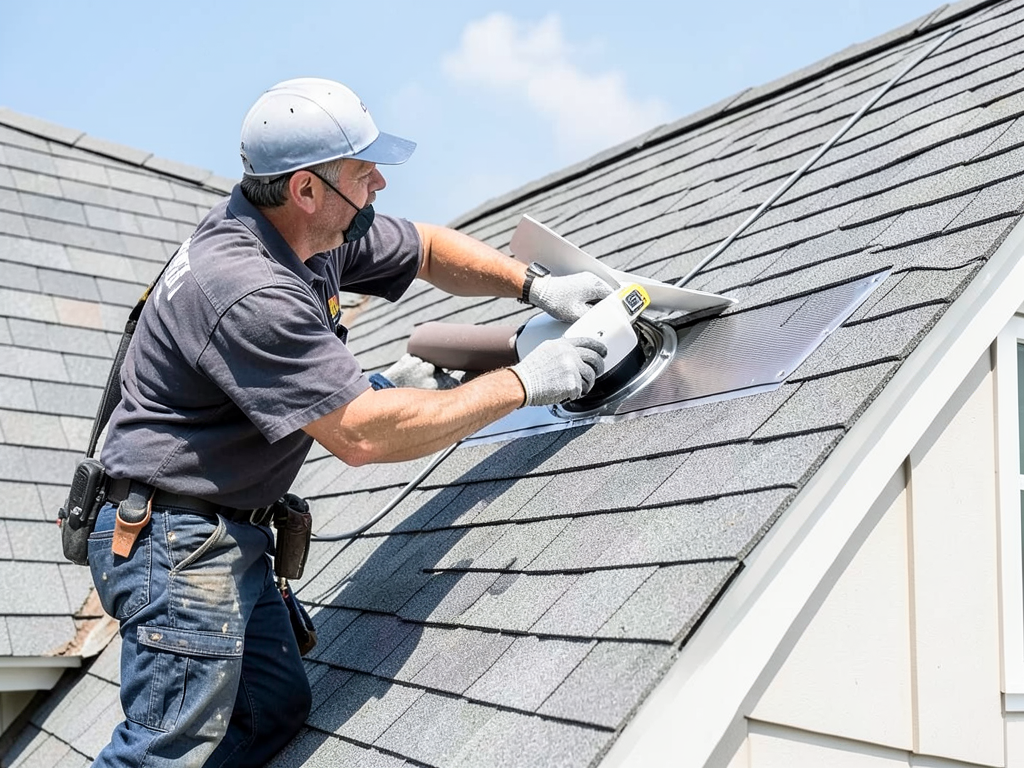
Marion County requires permits for roof replacements, but many contractors skip this step to save money and time. Permitted work gets inspected to verify proper installation methods and code compliance. You gain legal protection when problems arise later. Elite Roofing Indianapolis pulls permits for every job because we stand behind our work. We understand local building officials expect specific ventilation ratios, proper flashing techniques, and correct fastener schedules. Our familiarity with Indianapolis inspectors means your project passes inspection the first time without delays. Choosing a contractor who follows local regulations protects your investment and ensures your roof performs as designed when the next severe storm hits.

Roofing Services in The Indianapolis Area

We invite you to view our service area and main office location on the map below. While we primarily work on-site at your residential or commercial property, our central Indianapolis location allows us to dispatch our expert teams quickly across the entire metro area and surrounding communities. We are committed to being your accessible, local roofing partner, ready to serve your needs efficiently and professionally wherever you are.

Address:
Elite Roofing Indianapolis, 4201 Millersville Rd, Indianapolis, IN, 46205

Additional Services We Offer

Our news updates

Latest Articles & News from The Blogs

Roof replacement costs for rental properties in the Near Eastside Replacing a roof on a rental property in Indianapolis’s Near…

Roof replacement costs for rental properties in the Near Eastside

Roof replacement costs for rental properties in the Near Eastside Replacing a roof on a rental property in Indianapolis’s Near…

How the brutal Indiana summer heat ages your shingles faster than you think

How the brutal Indiana summer heat ages your shingles faster than you think Indiana summers are no joke. When July…

Maintaining the unique charm and complex rooflines of a Forest Hills Tudor home

Maintaining the unique charm and complex rooflines of a Forest Hills Tudor home Your Forest Hills Tudor home stands out…

Contact Us

Stop guessing about your roof condition. Call Elite Roofing Indianapolis at (317) 703-7557 for a comprehensive inspection with written documentation and photos. We provide honest assessments and detailed estimates with no pressure sales tactics. Protect your home with local expertise that understands Indianapolis weather and building codes.